Get your team on OneHRIS
from zero to payroll
This guide walks you through account creation, the setup wizard, adding your employees, and running your first payroll — whether you're on the Free tier or doing a full enterprise rollout.
Sign up at onehris.ph
Go to onehris.ph/register. No credit card required — the Free plan is provisioned immediately.
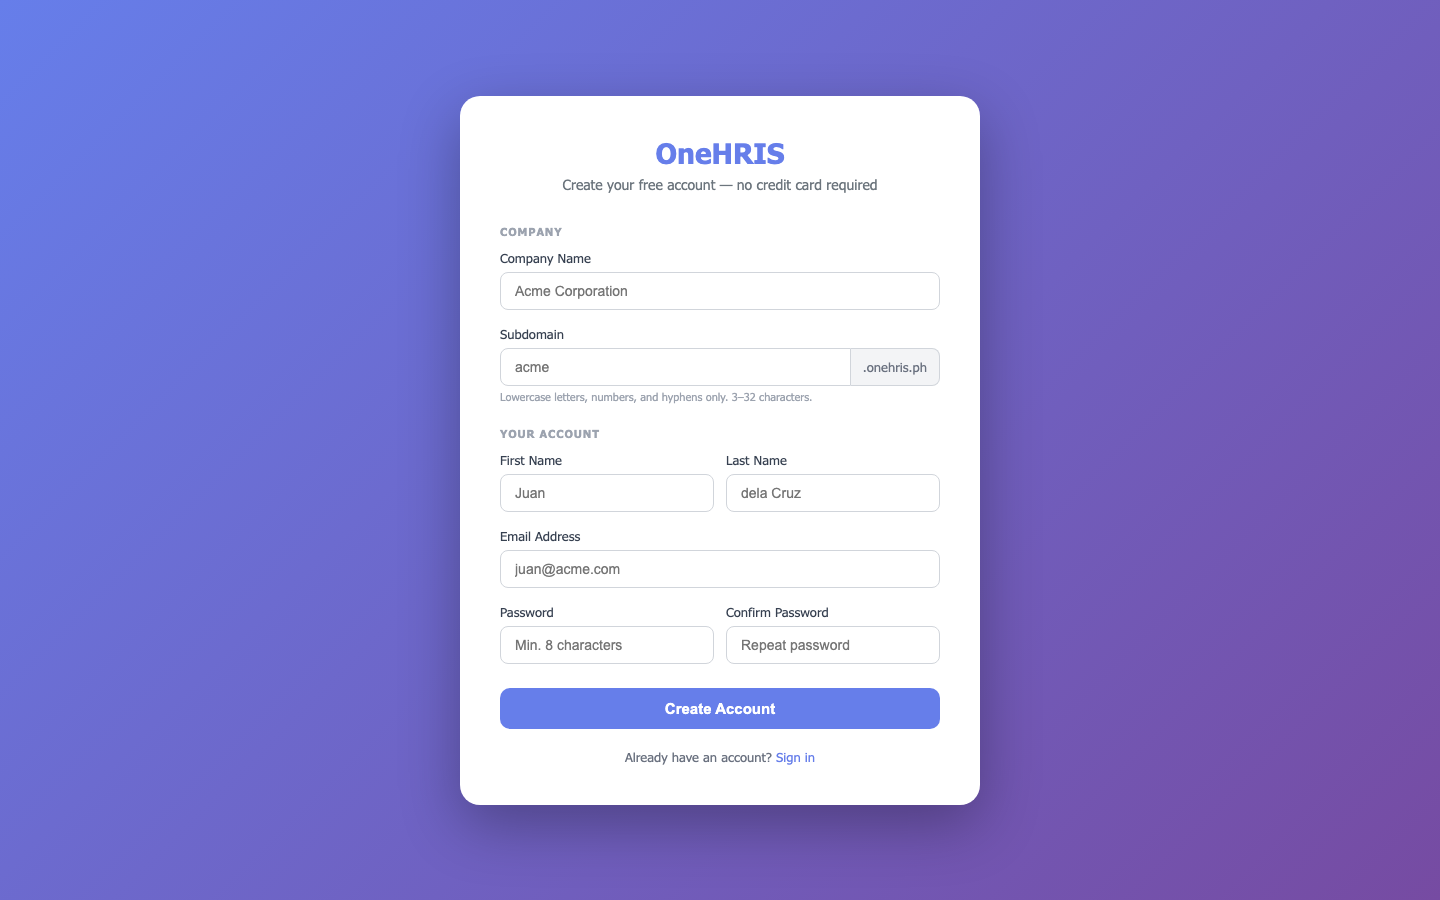
Registration — complete in under 2 minutes, no credit card required
| Field | Notes |
|---|---|
| Company Name | Your legal or trade name. Appears on payslips and reports. |
| Subdomain | Becomes yourcompany.onehris.ph. Lowercase, numbers, hyphens only (3–32 chars). Cannot be changed after registration. |
| First / Last Name | The primary admin account holder. |
| Email Address | Used for login and all system notifications. |
| Password | Minimum 8 characters. Must include letters and a number. |
Access your workspace
After email verification, navigate to yourcompany.onehris.ph and sign in.
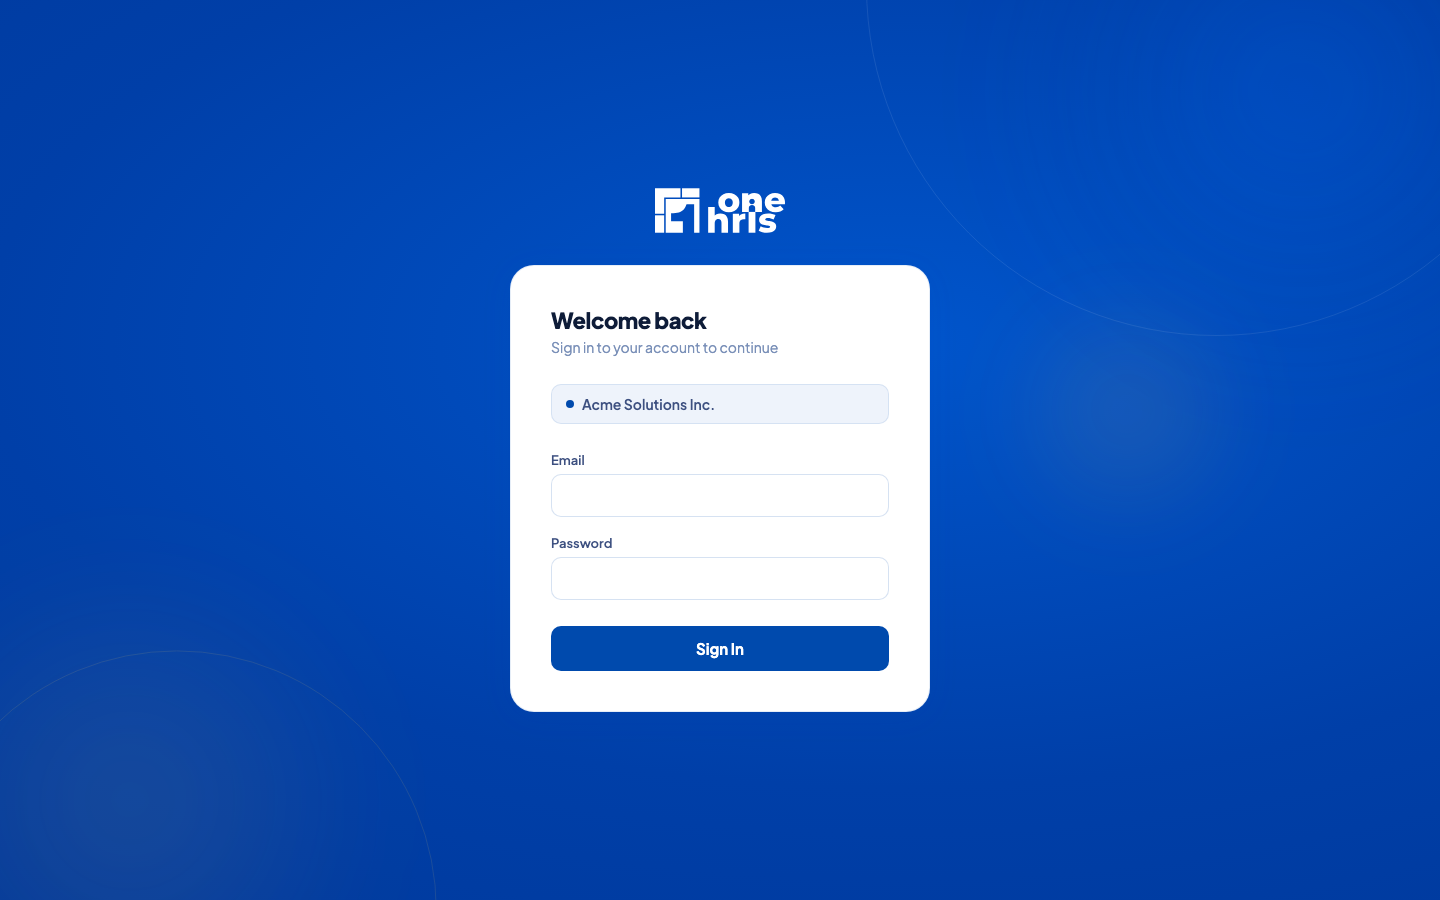
The company name is displayed on the login card — confirms you are on the correct tenant
Step 1 of 3 — Company Details
First-time login automatically redirects to the Setup Wizard. This runs only once.
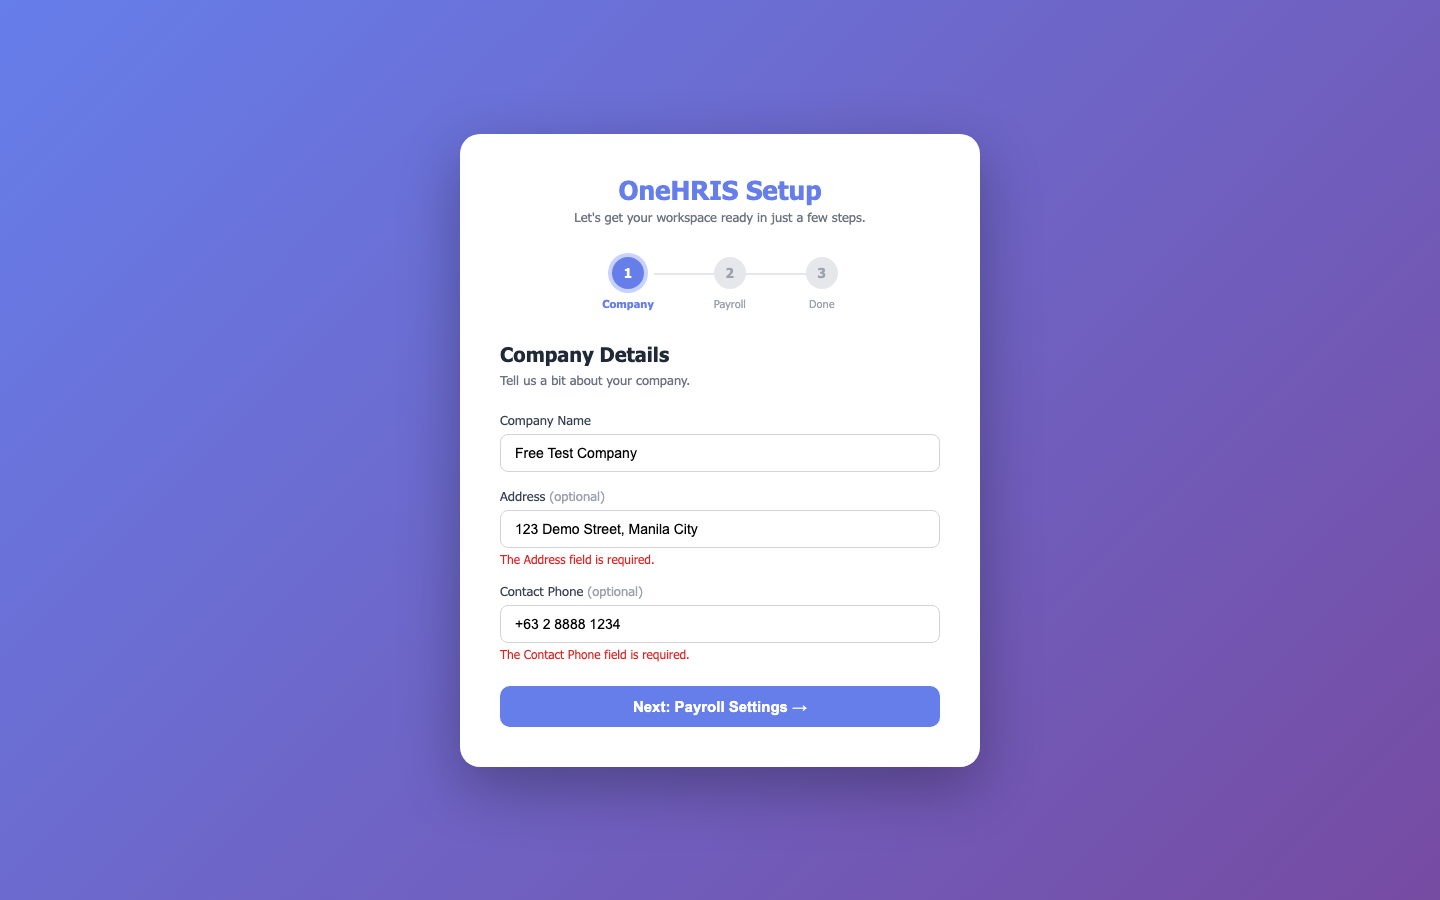
Setup Wizard Step 1 of 3 — Company Details
| Field | Notes |
|---|---|
| Company Name | Pre-filled from registration. Edit here if needed. |
| Address | Optional. Printed on payslips and government reports. |
| Contact Phone | Optional. Appears on system-generated documents. |
Click Next: Payroll Settings → to continue.
Step 2 of 3 — Payroll Settings
Configure your payroll schedule. These defaults apply to all employees in the standard payroll group.
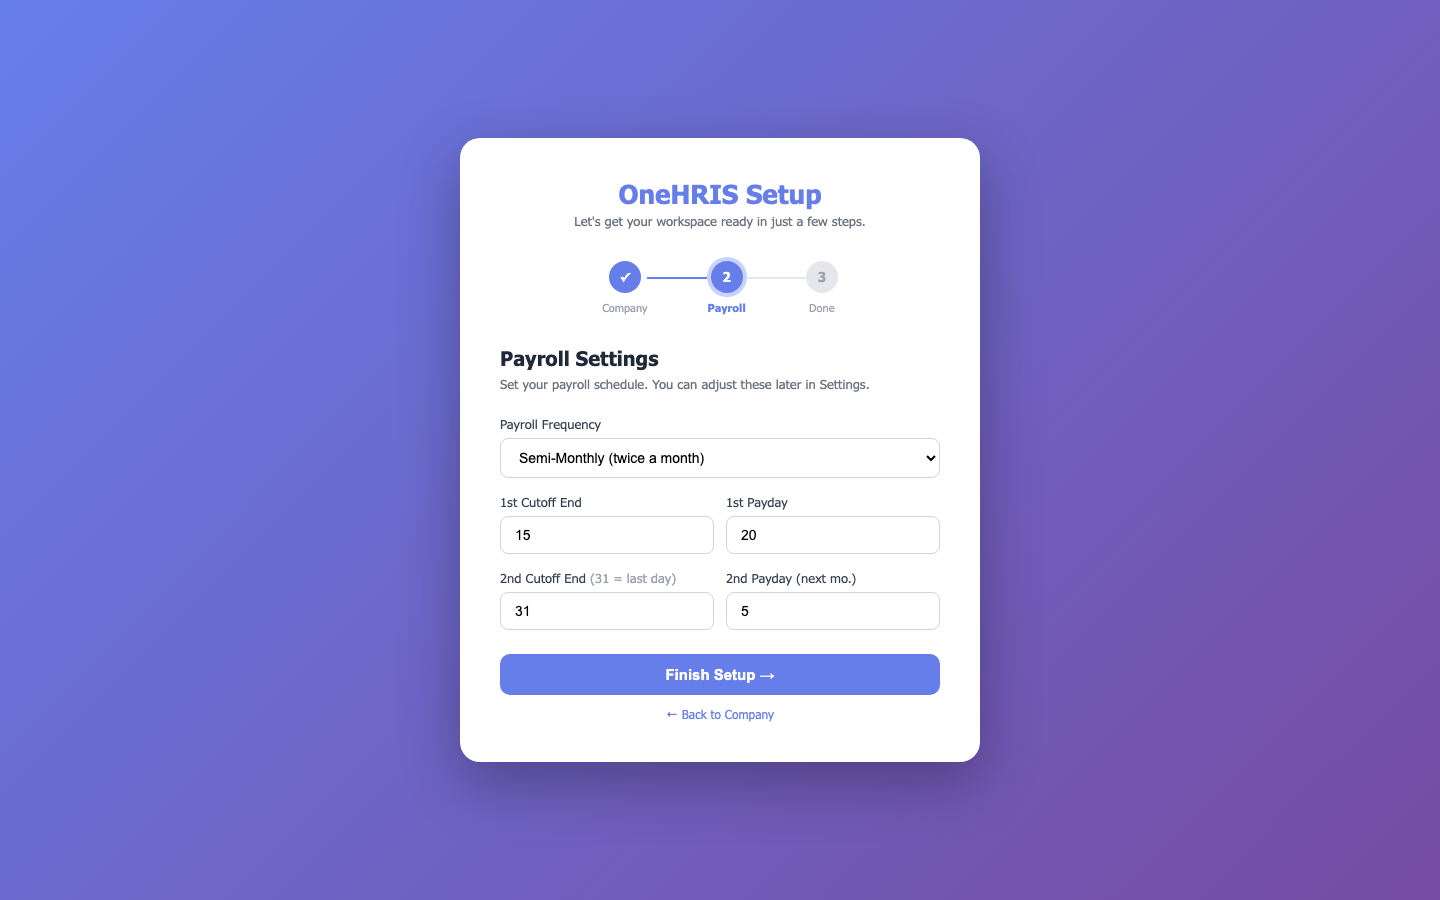
Setup Wizard Step 2 of 3 — Payroll Settings
| Field | Default | Notes |
|---|---|---|
| Payroll Frequency | Semi-Monthly | Semi-Monthly (twice/month), Monthly, or Weekly |
| 1st Cutoff End Day | 15 | Last calendar day of the first pay period |
| 1st Payday | 20 | Pay date for the first period of the month |
| 2nd Cutoff End Day | 31 (last day) | End of month (system uses actual last day) |
| 2nd Payday (next mo.) | 5 | Pay date in the following month for the 2nd period |
Click Finish Setup → to complete the wizard.
Workspace provisioned
Your OneHRIS workspace is ready. The system has auto-seeded DOLE-compliant defaults.
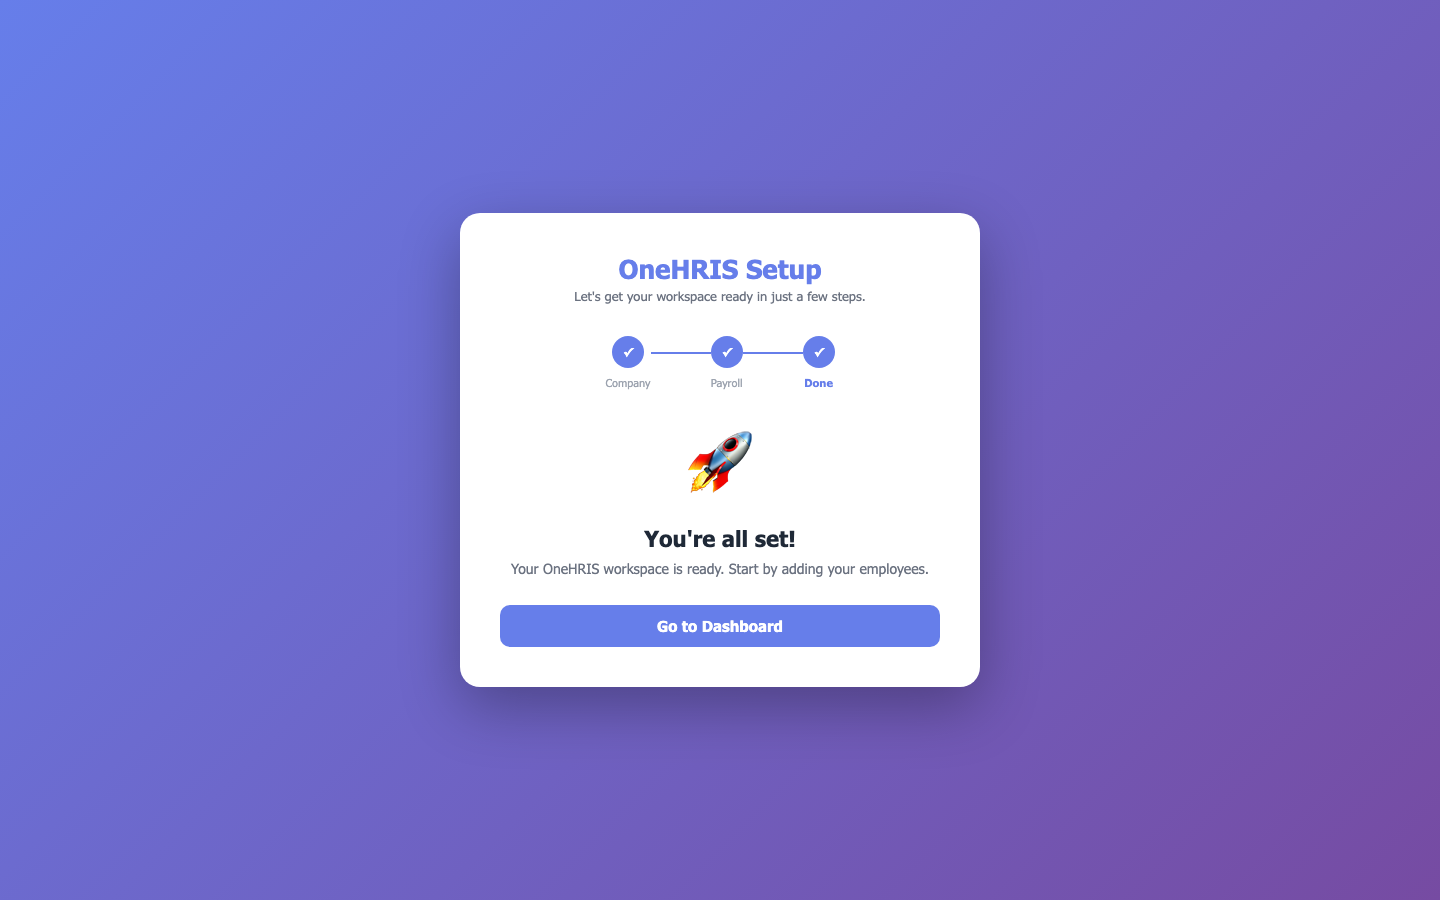
Setup complete — all 3 steps checked
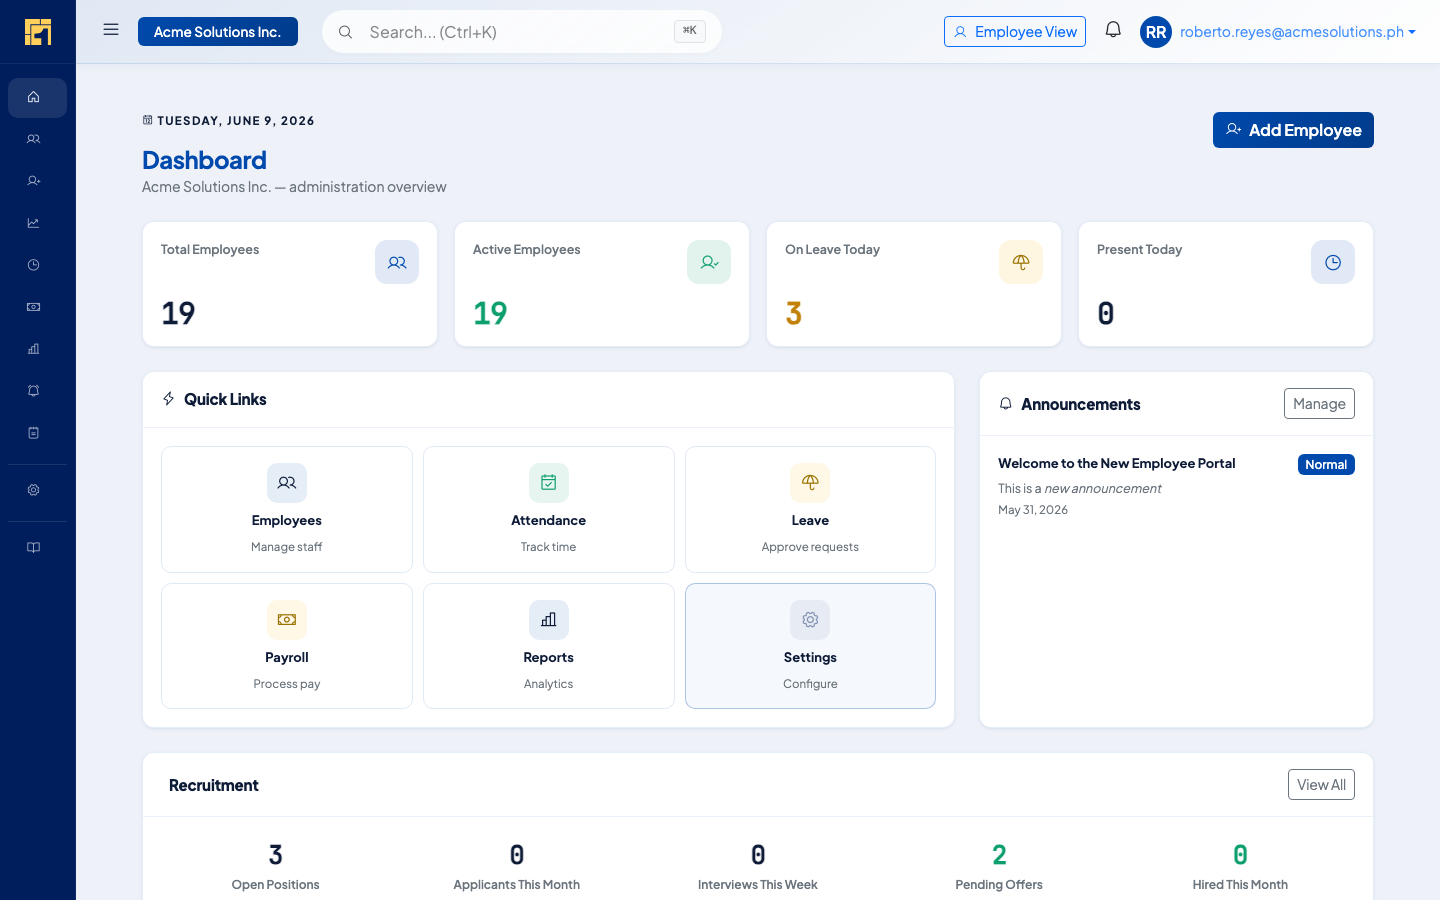
Admin dashboard — full HR overview at a glance
General Department
A default department is created. Add your own departments under Settings → Departments before adding employees.
Standard Schedule
Mon–Fri 8:00–17:00 (DOLE standard) is pre-configured. Assign to employees or create custom schedules.
3 Leave Types
SIL (5 days, DOLE-mandated), Vacation Leave, and Sick Leave are ready. Edit entitlements under Settings → Leave.
What's included on Free
The Free plan gives small teams a fully functional HRIS — no time limit, no hidden fees.
| Feature | Free | Standard | Professional | Enterprise |
|---|---|---|---|---|
| Max Employees | Up to 10 | Up to 50 | Unlimited | Unlimited |
| Leave Management | ✓ | ✓ | ✓ | ✓ |
| Attendance Tracking | ✓ | ✓ | ✓ | ✓ |
| Basic Payroll (SSS / PhilHealth / Pag-IBIG / Tax) | ✓ | ✓ | ✓ | ✓ |
| Employee Self-Service Portal | ✓ | ✓ | ✓ | ✓ |
| Contract Management | ✓ | ✓ | ✓ | ✓ |
| Admin Accounts | 1 | 3 | Unlimited | Unlimited |
| BIR 2316 / Alphalist | — | ✓ | ✓ | ✓ |
| Bank File Generation | — | ✓ | ✓ | ✓ |
| Email Payslips | — | ✓ | ✓ | ✓ |
| Custom Reports | — | — | ✓ | ✓ |
| Branch Management | — | — | ✓ | ✓ |
| GPS / Biometric Import | — | — | ✓ | ✓ |
| AI Policy Import | — | 5/mo | 20/mo | Unlimited |
| SSO / MFA | — | — | — | ✓ |
| Dedicated Infrastructure | — | — | — | ✓ |
Full setup for your first payroll run
Follow these 6 steps in order. Each step is a prerequisite for the next. You can add more employees or adjust configurations at any time, but this sequence ensures your first payroll run processes without errors.
What you'll complete
- Configure departments & positions
- Add employees
- Create employee contracts (sets salary)
- Assign work schedules
- Configure leave types & balances
- Set up payroll groups
- Enter or import DTR for the pay period
- Run and approve your first payroll
Time estimate
Varies by team size:
- 1–10 employees: ~45 minutes
- 11–50 employees: ~2–3 hours
- 50+ employees: Use CSV import (see Step B)
Configure Departments & Positions
- 1Open Settings → Departments Click Add Department.
- 2Enter department details Name and Code (e.g. "Finance / FIN"). The "General" department from setup can be renamed or kept.
- 3Repeat for each department Add as many as your org needs. Departments can be nested for multi-level hierarchy.
- 1Open Settings → Positions Click Add Position.
- 2Enter position details Title, Department, Employment Type (Regular/Probationary/Project).
- 3Set salary grade (optional) Link to a salary bracket if you use grade-based pay scales.
Add Employees
Add employees individually or import them in bulk via CSV. Both paths require the same core fields.
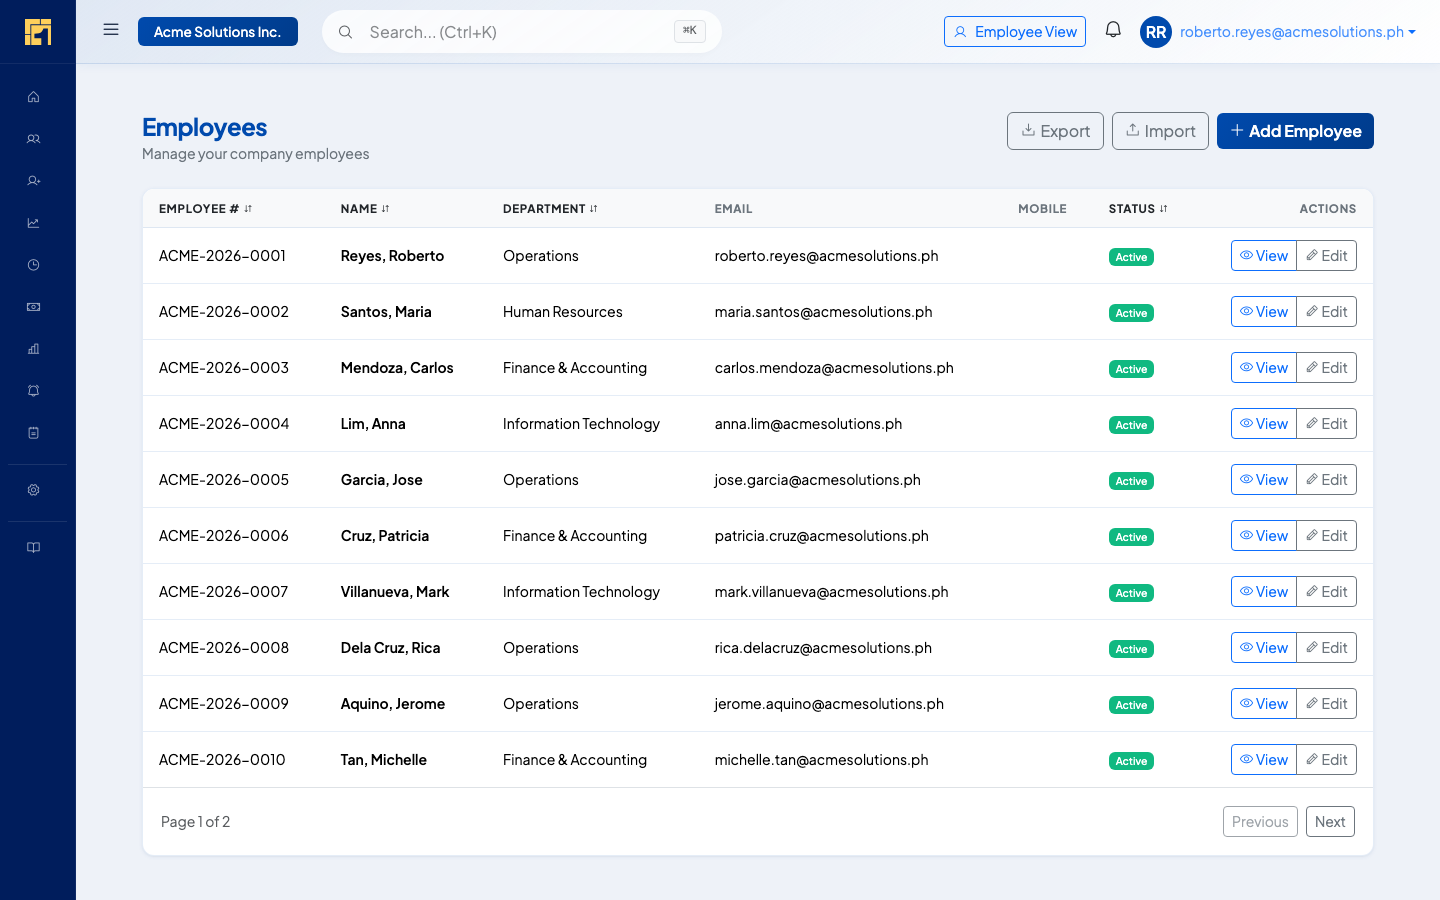
Employees list — showing employee number, department, status, and quick action buttons
| Field | Required for Payroll | Notes |
|---|---|---|
| Full Name | Required | First, middle initial, last name |
| Email Address | Required | Used for self-service portal login and notifications |
| Department | Required | Must exist before adding the employee |
| Position | Required | Must exist under Settings → Positions |
| Employment Type | Required | Regular, Probationary, Contractual, Project |
| Hire Date | Required | Used for SIL accrual eligibility and service length |
| Payroll Group | Required | Determines pay schedule; assign to default group if unsure |
| SSS Number | Recommended | Required for SSS contribution reports and BIR filing |
| PhilHealth Number (PIN) | Recommended | Required for PhilHealth reports |
| Pag-IBIG MID | Recommended | Required for Pag-IBIG remittance reports |
| TIN | Recommended | Required for BIR 2316 and tax withholding |
| Bank Account Number | For bank files | Required if generating bank disbursement files |
Create Employee Contracts
Contracts are required for payroll. The engine reads the active contract to determine each employee's basic salary, rate type, and employment terms. An employee without an active contract shows an Error status and is blocked from payroll processing.
- 1Open the employee record → click the Contracts tab.
- 2Click Add Contract to open the contract form.
- 3Fill in the required fields — see table below.
- 4Save — the contract becomes active immediately if Start Date ≤ today.
| Field | Notes |
|---|---|
| Contract Type | Regular, Probationary, Project-based, or Contractual |
| Start Date | Contract effective date — commonly the hire date for regular employees |
| End Date | Leave blank for open-ended (regular) contracts; required for fixed-term |
| Rate Type | Monthly or Daily — determines how the basic rate is applied per pay period |
| Basic Salary | Monthly rate or daily rate depending on Rate Type |
Assign Work Schedules
Work schedules determine expected hours, tardiness thresholds, and overtime eligibility. One default schedule is pre-configured.
Standard Schedule (pre-configured)
Mon–Fri, 8:00 AM – 5:00 PM, 1 hour flexible break. DOLE minimum: 40 required hours/week. Assign to most employees if you have a standard office setup.
Custom Schedules
Create shift templates under Settings → Work Schedules. Set working days, time-in/out, break duration, grace period, and overtime rules per shift.
- 1Open the employee record Employees → find employee → click Edit.
- 2Select schedule Under the Schedule section, choose from the dropdown.
- 3Save The schedule takes effect from the next attendance processing cycle.
Configure Leave Types
Three statutory leave types are pre-configured. Adjust entitlements or add company-specific types before issuing opening balances.
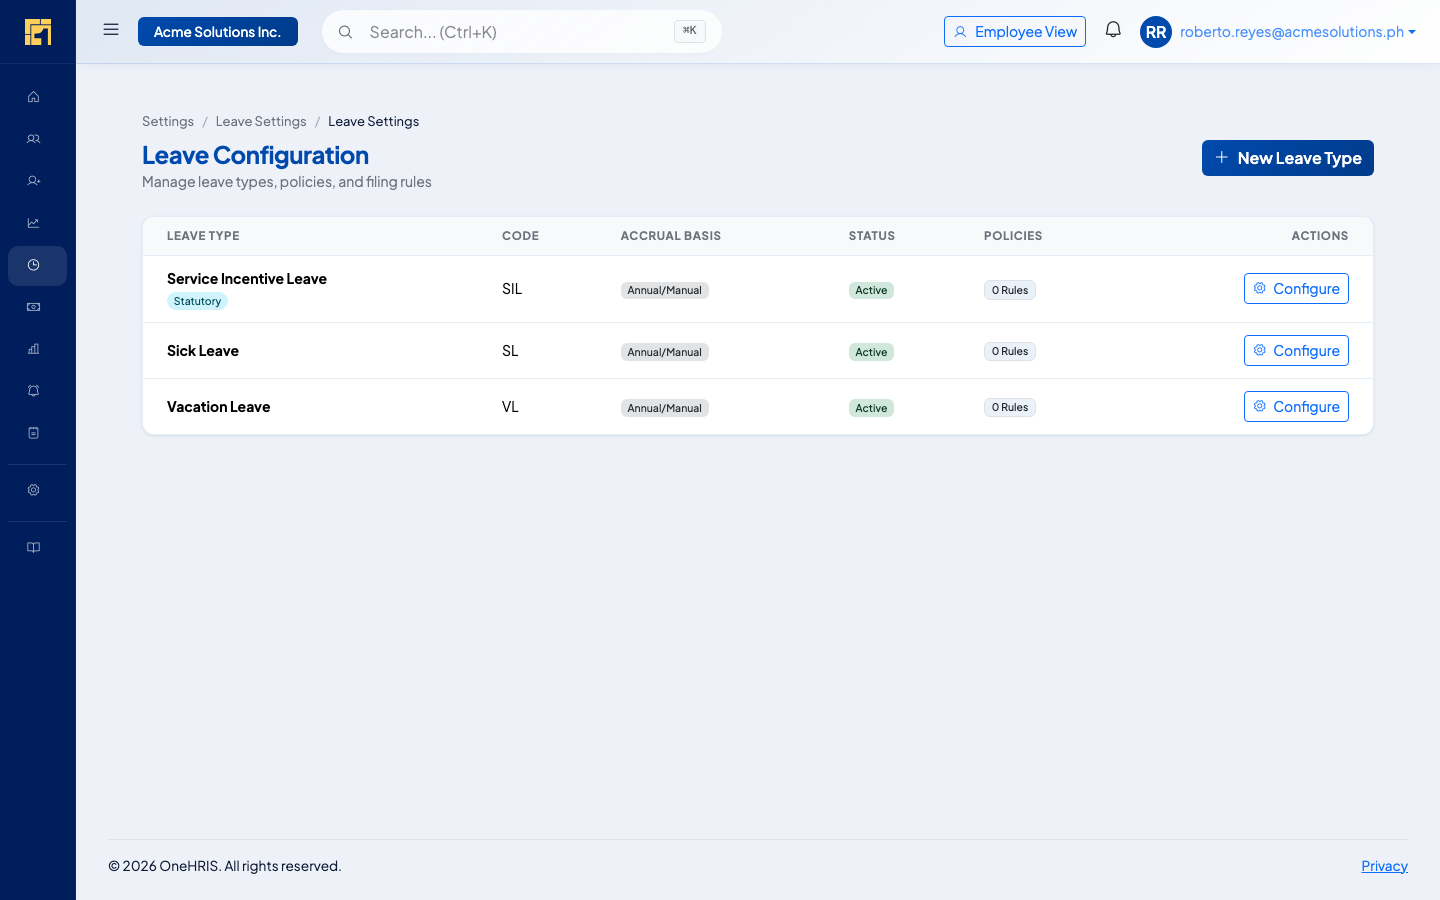
Leave configuration — manage entitlements, accrual rules, and conversion settings per leave type
Service Incentive Leave (SIL)
5 paid days/year, DOLE Labor Code Art. 95. Convertible to cash if unused. Eligible after 12 months of service.
Vacation Leave (VL)
5 days default. Edit to match your company policy. Set minimum months of service to file (common: 6 months).
Sick Leave (SL)
5 days default. Medical certificate required for absences over 3 consecutive days. Retroactive filing allowed up to 3 days.
- 1Review pre-configured types Click each leave type to check entitlements match your policy. Edit as needed.
- 2Add company-specific leaves Click Add Leave Type for leaves like Maternity/Paternity, Solo Parent, Bereavement, Birthday Leave, etc.
- 3Issue opening balances For existing employees with carry-over credits, go to Leave → Leave Balances Management → Adjust Balance and enter each employee's opening balance per leave type.
Set Up Payroll Groups
Payroll groups control which employees are processed together and on what schedule. The setup wizard created one default group.
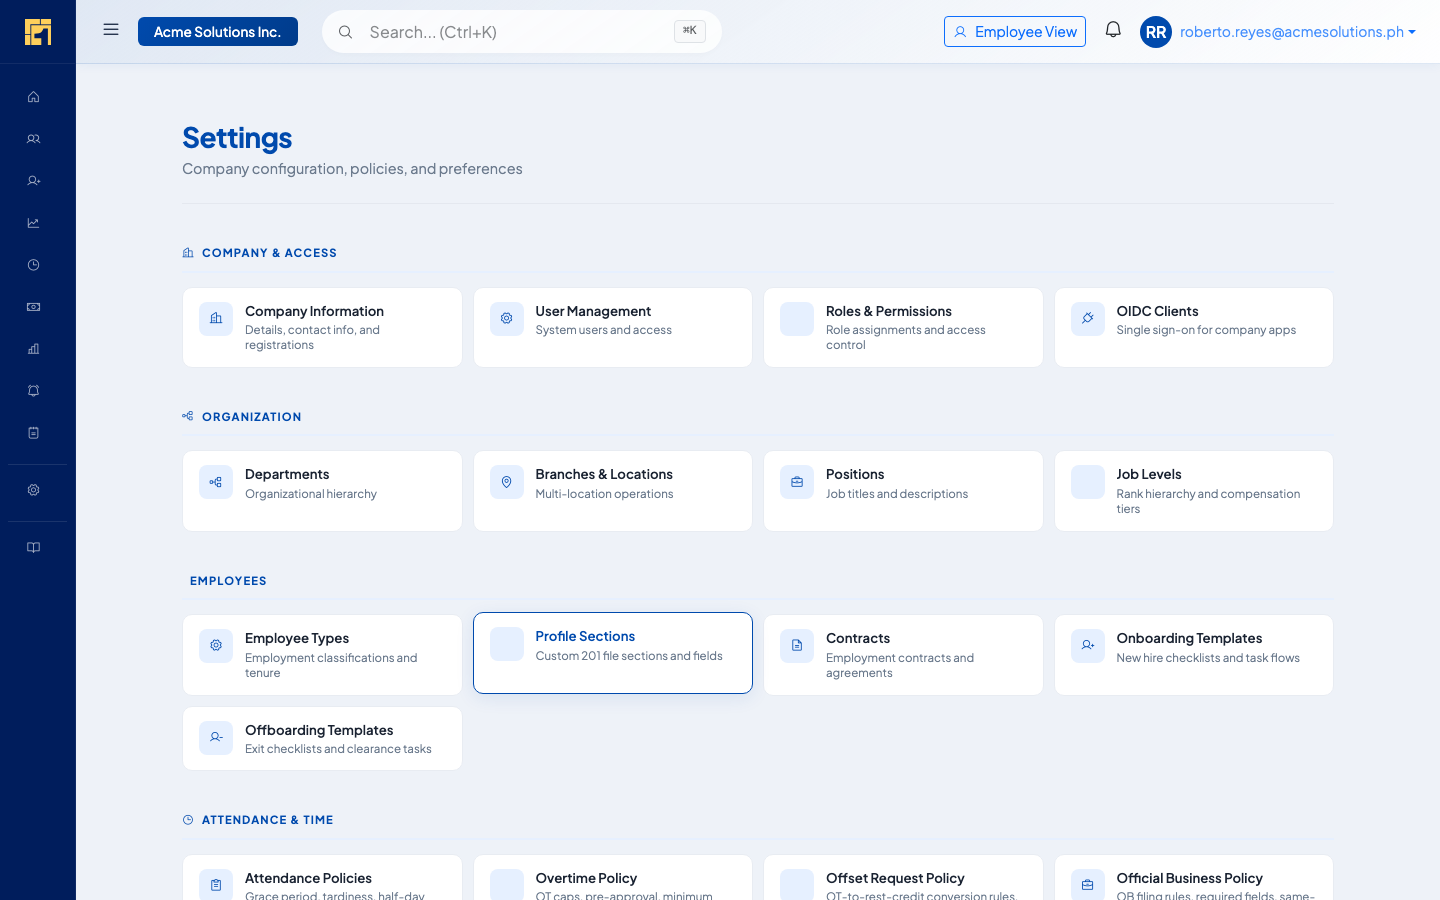
Settings — navigate to Payroll → Groups to manage payroll group configuration
- 1Verify the default group Settings → Payroll → Groups → open the group → confirm Frequency matches the setup wizard.
- 2Check employee assignments All employees should be assigned to at least one payroll group. Employees without a group will be skipped at payroll run time.
- 3Create additional groups if needed For multiple pay frequencies, create separate groups with distinct frequency settings.
Enter or Import DTR
DTR (Daily Time Record) data for the pay period must exist before running payroll. Without DTR, the engine has no record of actual attendance and cannot compute absences, tardiness deductions, overtime, or night differential — it falls back to the full contract rate for every employee.
Manual Entry
Attendance → Daily Time Records → Add. Best for small teams or entering exception records only (absences, half-days).
Biometric / GPS Import
Attendance → Import → Upload File, then map columns to the template. Use for teams with a physical time clock or mobile attendance app.
Shift Planner
Scheduling → Weekly Schedule Planner. For shift workers whose confirmed schedule serves as the attendance record.
- 1Confirm records exist Go to Attendance → Daily Time Records and verify every employee has records for all working days in the pay period.
- 2Resolve flagged entries Approve or reject tardiness, absences, and overtime that require manager sign-off before payroll locks them.
- 3If importing: Attendance → Import → Upload File → map columns → confirm. Resolve row-level errors before proceeding.
Run Your First Payroll
Once all employees have an active contract, DTR for the period, and a payroll group, you're ready to run payroll.
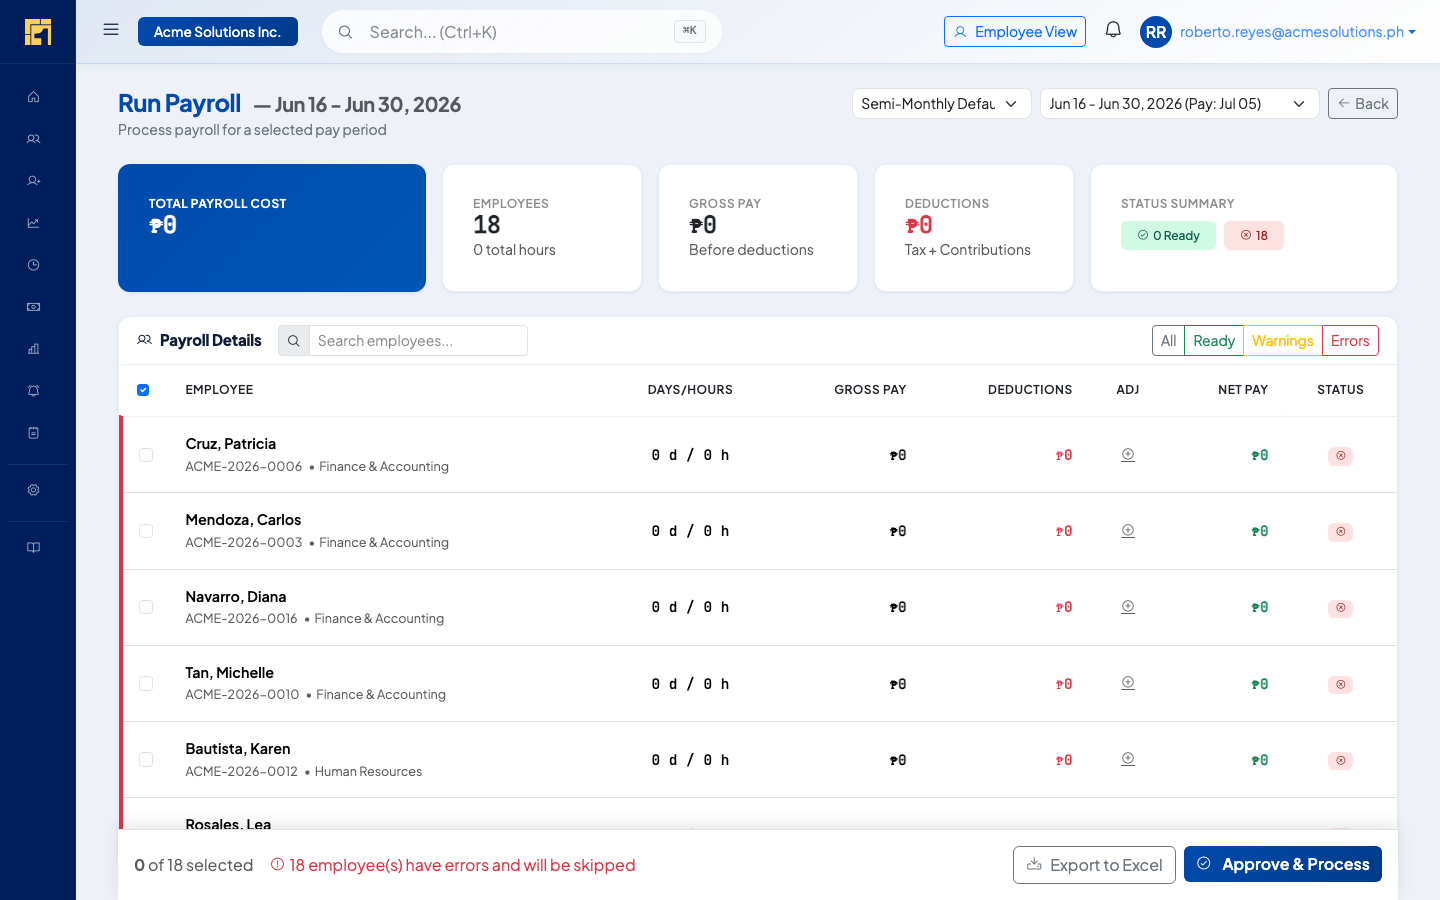
Run Payroll — shows each employee's days, gross pay, deductions, net pay, and processing status
-
1
Select the pay period Choose the period from the dropdown (e.g., "Semi-Monthly Default — Jun 16–Jun 30, 2026"). The system auto-suggests the current open period.
-
2
Review the Payroll Details table Each employee row shows: Days/Hours worked, Gross Pay, Deductions (Tax + Gov't Contributions), Adjustments, Net Pay, and Status.
-
3
Resolve Errors (red badge) Employees with errors are excluded from processing. Common causes:
- No active Contract (missing salary — create one under Employee → Contracts)
- No Payroll Group assigned
- Missing TIN (blocks tax withholding computation)
-
4
Review Warnings (amber badge) Warnings are non-blocking but should be addressed. Examples: missing SSS/PhilHealth/Pag-IBIG numbers, incomplete attendance records.
-
5
Select employees to include Check individual rows or select all. Use the status filter to focus on Ready employees first.
-
6
Click Approve & Process The payroll run is locked. Payslips become available immediately in Payroll → Payslips.
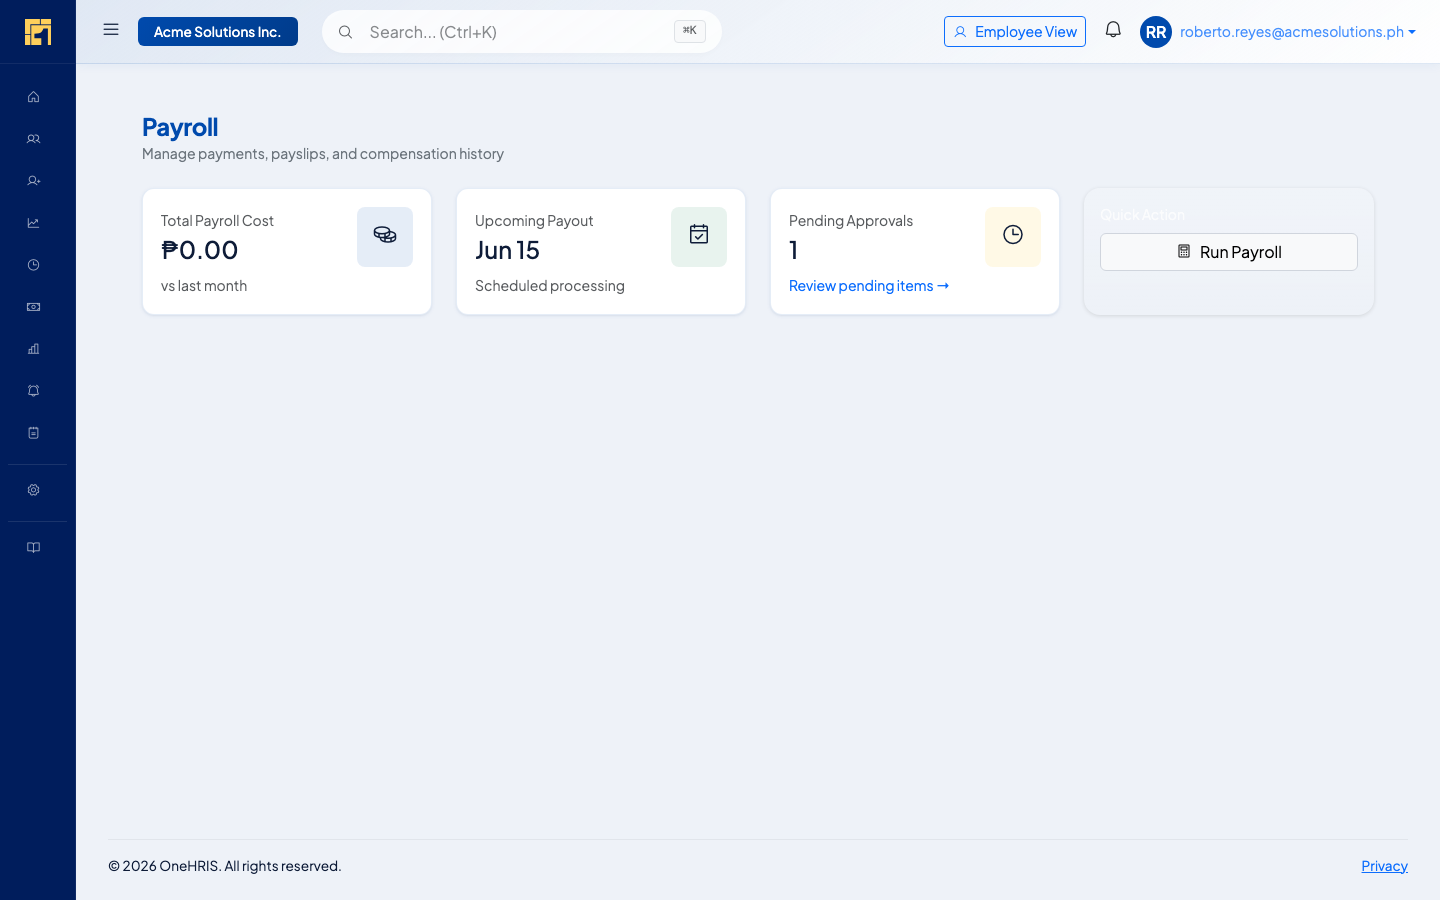
Payroll home — shows total cost, upcoming payout date, pending approvals, and the Run Payroll quick action
Quick Reference Checklists
Minimum to run payroll
- Create account at onehris.ph/register
- Verify email linkSent immediately after registration
- Complete Setup Wizard — Steps 1 & 2Company details + Payroll schedule
- Add at least 1 employee
- Create an active Contract for that employeeSets Rate Type and Basic Salary — required for payroll
- Assign employee to the default Payroll Group
- Enter DTR records for the employee for the current pay periodAttendance → Daily Time Records — required for accurate computation
- Go to Payroll → Run Payroll and process
Complete pre-payroll checklist
- Create account + complete Setup Wizard
- Configure DepartmentsSettings → Departments
- Configure PositionsSettings → Positions
- Add all active employeesManually or via CSV import
- Create an active Contract for each employeeEmployee → Contracts → Add Contract (sets Rate Type + Basic Salary)
- Assign Work Schedules to each employee
- Enter or import DTR for all employees for the pay periodAttendance → Daily Time Records — without this, payroll computes at full contract rate only
- Configure Leave Types + issue opening balancesSettings → Leave Configuration
- Verify Payroll Groups and employee assignmentsSettings → Payroll → Groups
- Enter government IDs (SSS, PhilHealth, Pag-IBIG, TIN)
- Enter bank account numbersRequired for bank file generation
- Verify statutory tables match current ratesSettings → Statutory Tables
- Run payroll — resolve all Errors before processing
- Distribute payslips via portal or email